There are a number of different components required to get your lead magnet online and generating leads. Let's take a look at everything involved:
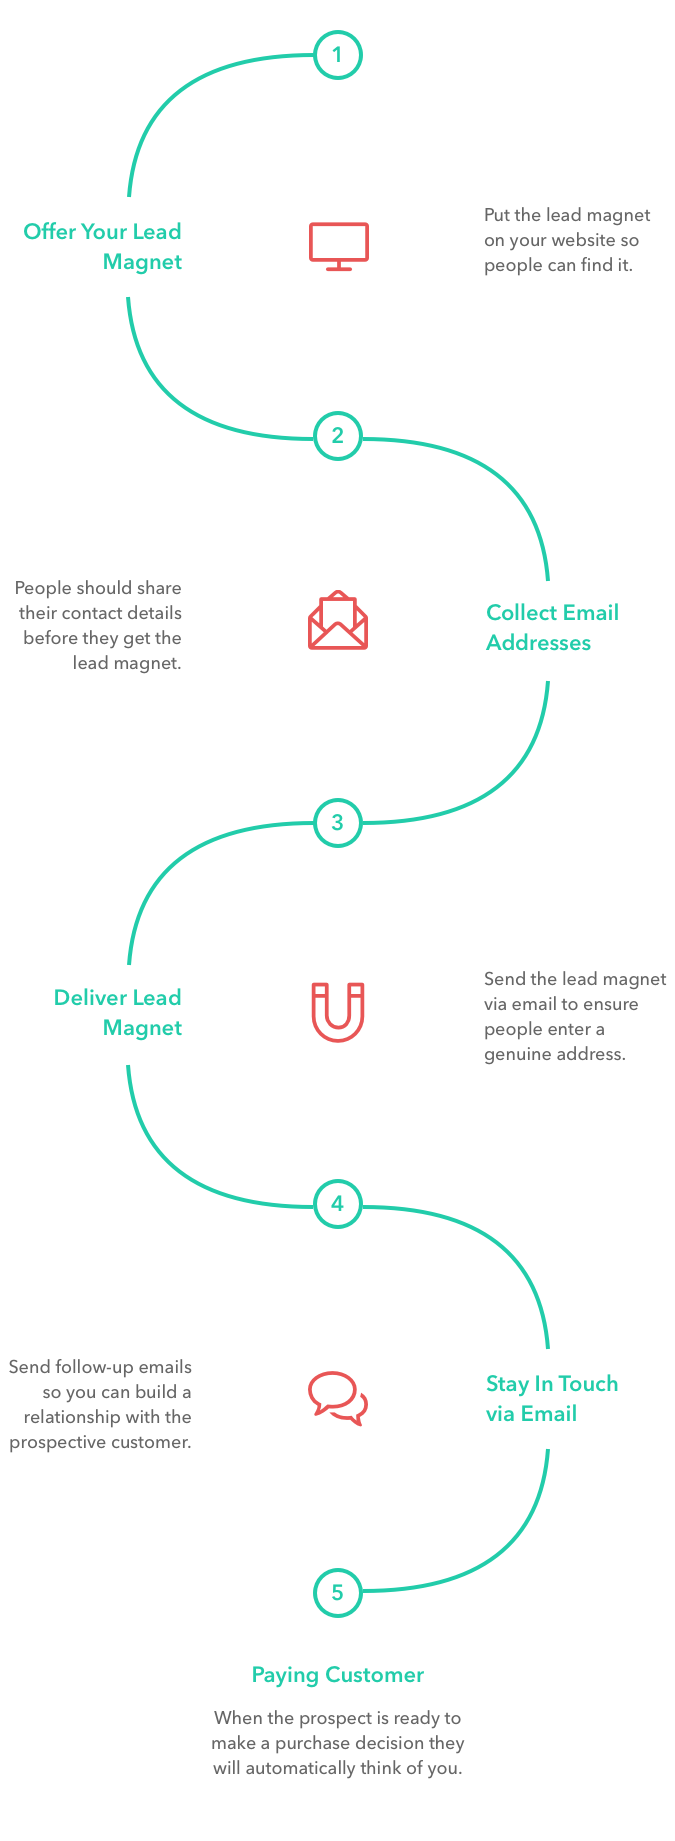
There's quite a lot happening there so let’s take a look at each individual stage.
1. Offer Your Lead Magnet
People can't download your lead magnet unless they can find it. You can share a link to your lead magnet on social media but the most common way of sharing a lead magnet is to make it available on your website.
Showing a thumbnail image of your lead magnet is a good way of attracting attention to it.
Note: Beacon will automatically create these thumbnail images for you.
2. Collect Email Adresses
If you want to swap your lead magnet for someone's contact information then you'll need a form to collect the info.
The web form that people use to enter their contact details is called an 'opt-in form'. It can contain as many fields as you need but the most important one is 'email address'.
Shorter forms require less work for the reader to complete so will have a higher conversion rate.
There are a few different ways to present your opt-in form:
Landing Page
A dedicated page on your website that only exists for people to download your lead magnet.
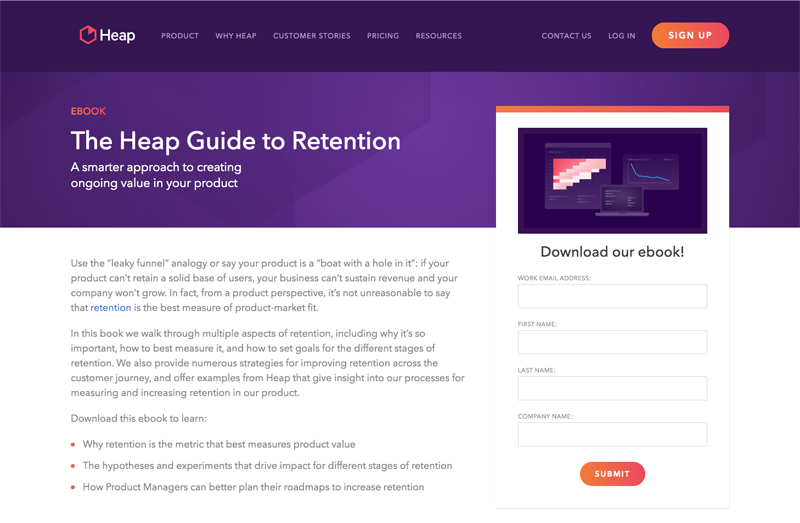
Example of an eBook landing page.
Pros - Lots of room to promote benefits of lead magnet
Cons - Can be time consuming to setup
Popup Form
A form that appears on top of a regular web page.
Example of a free guide being offered in a popup.
Pros - Hard to ignore
Cons - People can find them annoying
Note: You can create popup forms with Beacon.
Content Upgrade
A call-to-action inside a blog post that promotes your lead magnet.
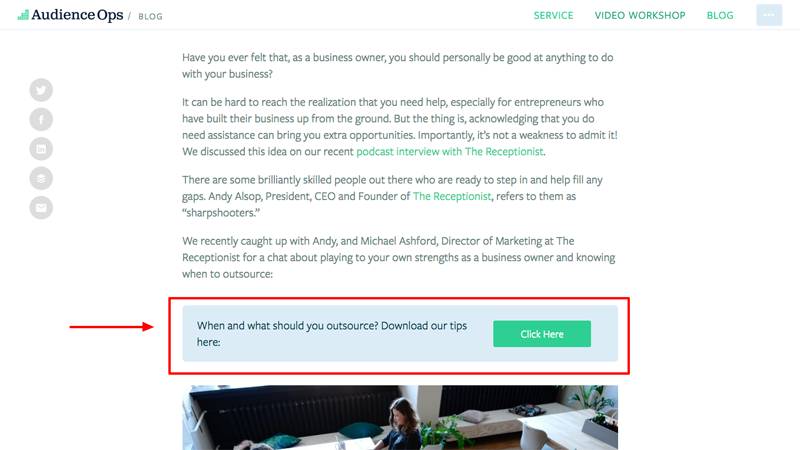
Example of a content upgrade in a blog post.
Pros - Very high conversion rates
Cons - You’ll have to write a blog post first
Note: You can create content upgrades with Beacon.
3. Deliver The Lead Magnet
Once your prospect has entered their contact details into the opt-in form you’ll need to automatically send them a copy of the lead magnet.
If you deliver the lead magnet via email then you can ensure that people enter their real email address.
Note: Beacon handles this step for you.
4. Stay In Touch
After you deliver the lead magnet to a prospective customer it’s a good idea to follow up with them a few days later so you can stay fresh in their mind.
If you have hundreds of people downloading your lead magnets then it won’t be possible to follow up with them all personally so an automated email sequence can take care of this for you.
The automated sequence could be as short as 3 emails like this:
Email 1: Introduce yourself
Email 2: Recommend products or services related to the lead magnet
Email 3: Ask if there’s anything you can do to help
You’ll need some dedicated email marketing software like Mailchimp, ConvertKit or Drip to get this up and running but once you do it can run on autopilot.
Note: You can connect your Beacon opt-in form with these email services so your automated sequence begins after people receive their lead magnet.